My Podcasting Setup
Looking to start a podcast, but don’t know what gear to use? I didn’t know either! Through trial and error, here is what I’ve settled on.
My podcasting mic
I normally record over the internet, and so I only need a mic for myself. The mic I use is the ATR 2100. This is widely regarded as the best value mic. Everybody uses it.
One great thing about the ATR 2100 is that it has both USB and XLR outputs. You can hook it right up to your computer, or for even better sound quality and control, you can use the XLR connection to connect through what’s called an audio interface.

WANT TO WRITE A BOOK?
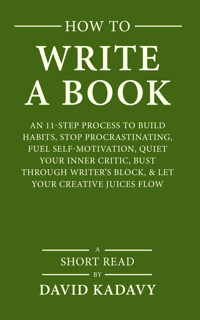
Download your FREE copy of How to Write a Book »
(for a limited time)
By the way, Blue has somehow gained a reputation for making good podcasting mics, which I vehemently disagree with. I find the audio to be terrible, so I recommend avoiding the Yeti or Snowball, or anything by Blue.
Podcasting digital audio interface
After using my ATR 2100 exclusively through USB for a couple of years, I got lucky and won a Tascam US-42 MiniStudio Creator audio interface, which allows me to connect via XLR.
The thing I love most about having an interface is that it enables me to monitor my own voice (meaning my voice plays back to me in real-time in my Bose QuietComfort 25 headphones). I have a tendency – as do many other people – to speak too loudly into microphones if I don’t have a monitor. This causes unpleasant distortion and strains your vocal cords.
A popular audio interface amongst podcasters – which I was considering buying before I won the Tascam – is the Focusrite Scarlett i2i. Both the Tascam and the Scarlett have two XLR connections, so could be used with a co-host or guest.
Podcasting boom arms, pop filters, etc.
Whatever your mic, you want some kind of pop filter or windscreen. This will prevent p sounds (or other “plosives”) from popping too much. I use an On Stage windscreen. For good measure, I also have a CAD audio pop filter.
I record in my closet. You can see my former set up in this video.
The main difference now is that I record standing up, and no longer take apart the drawers. The piece of gear that made this possible is the Heil SB-2 boom arm. This piece of equipment was a game changer for me. Nothing else will fit into such a small space.
I also have an On Stage MY410 shock mount. It does NOT fit the ATR 2100 – I have it leftover from when I had a different mic that I don’t recommend. I use a piece of foam to make up for this shock mount being too big, as described in this video. Shock mounts by the way prevent noise from vibrations in the environment, or touching your desk or other surfaces. It is not a must-have, but it does reduce noise.
In-person podcasting gear
For in-person interviews, I use what I already had before I started my podcast. I have a Zoom H1 digital recorder. Digital recorders capture more crisp audio than your computer. Plus, they’re portable.
I don’t recommend my in-person interview setup. I hook up two JOK Mic J Lav Mics to the Zoom H1 using a Y adaptor. The result is that both myself and my guest are recorded on one channel on the Zoom. I have to be careful to position the mics on myself and my guest so that our voices are about the same volume, since we’re on the same channel. I have to turn that one channel into mono.
I do this because the Zoom H1 only has one mic input. For an extra $120, you can get a Zoom H4N, which has two XLR inputs. I haven’t used it, but it’s a popular recorder amongst podcasters.
If you want to see why a digital recorder is any better than recording with an iPhone, and what the JOK lav mic sounds like, I put together this video.
I chose the JOK lav mics, after experimenting with others, because they are noise-cancelling condenser mics. This compromises sound quality, but it means it picks up much less background noise. When I started my podcast, I lived on a very busy street, so this was important to me at the time. Note that you can NOT hook these mics up to your computer or smartphone. But, you can route it through the H1, and hook that up to your computer via USB.
As you might have noticed by now, I don’t have ideal equipment. It’s easy to spend way too much and get way too deep into gear and end up not focusing on the podcast content, or worse yet not even starting your podcast.
(If you’re having trouble with the mental barriers to starting anything – such as a podcast – I have a book for that.)
Podcasting software
For recording conversations over the internet, in the beginning, I used Ecamm Call Recorder over Skype. Now, I first connect with the guest on Skype, and record on Zencastr. Zencastr has VOIP for actually having the conversation, too, but I like to use Skype for the VOIP piece, and record a backup with Call Recorder. Zencastr is great for sound quality, because it records your guest’s audio on their side. But, it does have some strange quirks. The tracks are often out of sync which creates extra work having to cut them so they line up.
For editing, in the beginning, I used Garageband. It’s pretty versatile for fading things in and out and even doing some EQ. If I needed to reduce noise on something, I’ll bring it into Audacity, which is free, to reduce noise first.
Currently, I have editors who do the editing and mastering for me. But I cut up conversations in Hindenberg Journalist. It’s not as versatile as Garageband, but I just find the interface easy to use for editing conversations.

